I finally got my first measurements by using some code which was put together from various samples for the ESP8266, DHT11 Shield and some other arduino sources. You can see the whole mess here:
#include<ESP8266WiFi.h>#include<ESP8266HTTPClient.h>#include<DHT.h>#include<ArduinoJson.h>// DHT Chip Kind
#define DHTTYPE DHT11
// DHT IO Pin
#define DHTPIN 2
// WiFi SSID
#define STASSID "Wifi SSID"
// WiFi Password.
#define STAPSK "Wifi Password"
// Post Url
#define URL "http://openhab/nodered/sensordata"
constchar* ssid = STASSID;
constchar* password = STAPSK;
DHT dht(DHTPIN, DHTTYPE, 11);
float humidity, temp_c; // Values read from sensor
unsignedlong previousMillis =0; // will store last temp was read
constlong interval =2000; // interval at which to read sensor
voidsetup() {
// You can open the Arduino IDE Serial Monitor window to see what the code is doing
Serial.begin(115200); // Serial connection from ESP-01 via 3.3v console cable
Serial.println();
Serial.println();
Serial.println();
// Connect to WiFi network
WiFi.persistent(false);
WiFi.mode(WIFI_STA);
WiFi.begin(ssid, password);
while (WiFi.status() != WL_CONNECTED) {
delay(500);
Serial.print(".");
}
Serial.print("Init DHT sensor");
dht.begin(); // initialize temperature sensor
}
voidloop() {
if ((WiFi.status() == WL_CONNECTED)) {
readSensorData();
postData();
} else {
Serial.printf("No WiFi connection\n");
}
delay(60000);
}
voidpostData() {
HTTPClient http;
if (http.begin(URL)) {
http.addHeader("Content-Type", "application/json");
const size_t capacity = JSON_OBJECT_SIZE(3) +50;
DynamicJsonDocument doc(capacity);
doc["temp"] = temp_c;
doc["humidity"] = humidity;
doc["mac"] = WiFi.macAddress();
String payload ="";
serializeJson(doc, payload);
Serial.println(payload);
int httpCode = http.POST(payload);
// httpCode will be negative on error
if (httpCode <=0) {
Serial.printf("HTTP: %s\n", http.errorToString(httpCode).c_str());
}
http.end();
} else {
Serial.printf("HTTP: Unable to connect\n");
}
}
// this was taken from https://github.com/Erratums/ESP8266/blob/master/ESP01S-DHT11/Basic/Basic.ino
boolreadSensorData() {
// Wait at least 2 seconds seconds between measurements.
// if the difference between the current time and last time you read
// the sensor is bigger than the interval you set, read the sensor
// Works better than delay for things happening elsewhere also
unsignedlong currentMillis = millis();
if(currentMillis - previousMillis >= interval) {
// save the last time you read the sensor
previousMillis = currentMillis;
// Reading temperature for humidity takes about 250 milliseconds!
// Sensor readings may also be up to 2 seconds 'old' (it's a very slow sensor)
humidity = dht.readHumidity();
temp_c = dht.readTemperature(false /* Celsius */);
// Check if any reads failed and exit early (to try again).
if (isnan(humidity) || isnan(temp_c)) {
Serial.println(F("Failed to read from DHT sensor!"));
} else {
return true;
}
}
return false;
}
This is far from perfect because the energy usage could be optimized (for example by powering off the wifi connection while nothing is done). A deepsleep mode would require some hardware modification because otherwise the cpu will not be able to wake up…
Also my original plan was to use https instead of http but I couldn’t get any connection. I guess due to my selfsigned cert for the machine running openhab, maybe i take a look at that later.
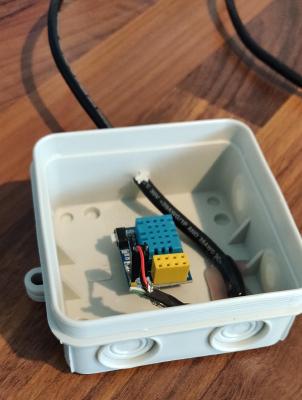
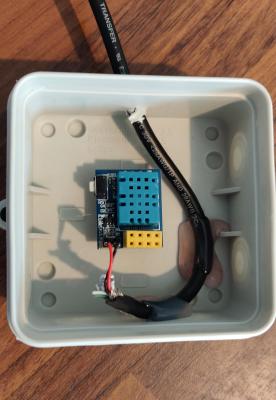
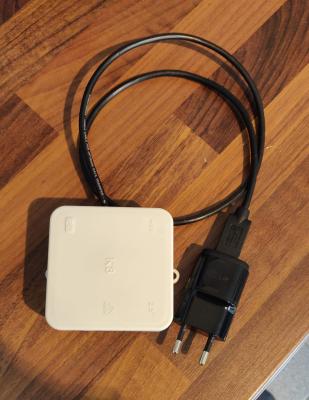
I also went to a hardware store and bought some cheap junction boxes the result can be seen here:
I might add some ventilation holes to it later. After flashing the whole thing it was time to build a very simple webservice with Node RED. This will later parse the json message and set the correct values in the openhab instance. You may have noticed that I send the MAC together with the sensor data. That way I can easily reuse the arduino code for multiple sensors without modification.
Node-RED could easily distribute the data based on the given MAC to the OpenHAB items they represent.